

The Sweetest Surprise: A Box of Bready Bears
There’s something magical about bread, especially when it’s warm, soft, and shaped like a bear. The very first time I ever experienced “bready bears” was completely unexpected. My husband, knowing how much I adore anything cute and cozy, surprised me with a box of homemade bready bears before leaving on a work trip. I still remember lifting the lid—soft, golden bear faces staring back at me—and immediately smiling through tears. They were almost too cute to eat. Almost.
Since then, these pillowy bear-shaped breads have become a family tradition. They’re the kind of thing that instantly feels special, even though they’re made with simple ingredients. Whether you’re five or fifty, there’s something deeply joyful about pulling a warm bready bear apart and sharing it at the table. Kids squeal when they see them come out of the oven, and grownups can’t help but smile.
A Family Kitchen Favorite
It didn’t take long for bready bears to become part of our home baking routine. What started as a sweet gesture from my husband quickly turned into a full-on family activity. Now, the kids love helping in the kitchen—rolling little dough balls, shaping tiny ears, and carefully placing raisin eyes just right. It’s messy, silly, and absolutely perfect.
The bears don’t have to look identical. In fact, that’s part of the fun. Some look sleepy, some surprised, and a few end up hilariously lopsided—but every one is filled with personality. And because they’re made from soft, lightly sweetened bread dough, they make the perfect snack or cozy breakfast. We love them warm with dairy-free butter or just plain right out of the oven.
Memories in the Making
What I’ve come to love most about making bready bears isn’t just the way they taste—it’s the way they bring us all together. On weekend mornings, I often find little hands tugging at my apron, asking, “Can we make bear bread today?” And of course, the answer is almost always yes.
Sometimes we give them as gifts—stacked neatly in bakery boxes, tied with twine. Friends and neighbors are always delighted, and they never expect something so adorable and homemade. Other times, we pack them in lunchboxes or save a few in the freezer for a rainy day. But no matter how or when we enjoy them, bready bears are a little reminder of comfort, creativity, and connection.
Every batch tells a story—and ours started with love in a box.
Which Gluten Free Flour Should I Use?
There are many Gluten Free flours on the market. How do you know which one to cook with? Well, to mimic the profile of gluten, you need light starch for lightness in texture, protein for strength, elasticity for texture, and medium starch for holding structure.
Every single gluten free flour will not have all four characteristics, which is why we mix gluten free flours together into a blend. My favorite store bought brand is currently Namaste. It is a blend of rice flours (the medium grain) & arrowroot (the light starch), xanthan gum (the binder to aid with elasticity), sorghum (the medium grain which contains higher sources of protein). So if making your own blend at home, I recommend choosing 2 medium grains (one containing a higher protein content), 1-2 starches, and 1 binder. The ratio I like so far is 2:1 for grain and starch + 1/4 tsp xanthan gum per cup of flour/starch. So for example:
- 2 cups fine white rice flour
- 2 cups Brown rice flour, OR sorghum flour, OR millet flour
- 1 cup tapioca starch
- 1 cup potato starch
- 1 1/2 tsp xanthan gum (1/4 tsp per cup of flour & starch)
See my in depth guide to gluten free bread flours here for helping you make your own blend!
This post may contain affiliate links. See full disclosure HERE.
Why Potato Water?
This ingredient comes with a fun story. A couple generations ago, my Great Grandma N. made her bread on their farm using regular flour, yeast, leftover potato water, heavy cream/milk from their cows, and lard. What’s funny is this was originally the food Great Grandma N. fed her dogs, until my Grandma Catherine came into the story. Grandma Catherine tried a bite of the bread. It quickly then became Great Grandma N’s most popular recipe among her family and friends. A loaf of bread never lasted more than a day in their home. Everyone always said it was the best bread they ever had and one slice would fill a large dinner plate. (Don’t worry the dogs still got their fair share & their German Shepard, Lady, lived to be 19 years old!)
I thought about this story when trying to make my gluten free bread rise and become less dense and more elastic. One day, I decided to mash up some potatoes with some water and add it to my gluten free flour blend. It was the first time my bread ever rose!!! And it was fluffy! I was so excited. It quickly became a staple in our home and still is to this day. I’m not a scientist, but I think the potato water gives the bread more structure, and helps ingredients bind together while still maintaining moisture content and not drying out. That is why I use potato water.
How To Store The Bread?
Homemade bread can get hard after being in the fridge for a while due to a process called retrogradation. Retrogradation occurs when the starch molecules in the bread begin to crystallize as they cool down, causing the bread to become stiff and dry. This is because the refrigeration process causes the moisture in the bread to move to the surface, making the bread less moist and more susceptible to becoming stale.
Furthermore, refrigeration can also speed up the staling process by accelerating the process of retrogradation. This is because the lower temperatures in the fridge can cause the starch molecules to crystallize at a faster rate than they would at room temperature. To prevent bread from getting hard after refrigeration, it’s best to store it at room temperature in a cool and dry place.
Alternatively, you can freeze the bread to extend its shelf life. Just make sure to wrap it tightly in plastic wrap or an airtight container to prevent freezer burn. When you’re ready to eat the bread, simply thaw it at room temperature or in the oven, and it should be just as fresh as when you first baked it.
Commercial bakeries use two types of ingredients to slow retrogadation— emulsifiers and enzymes. Emulsifiers keep bread from going stale by preventing oil and water from separating. Adding emulsifiers sometimes goes by the names “crumb softening” or “dough conditioning” because it works to preserve texture. I have yet to try emulsifiers and enzymes in my homemade recipe, but feel free to experiment and let me know how it goes!


Bready Bears (Gluten, Dairy, Egg, Soy, Nut Free)
A box of warm, homemade bready bears was the sweetest surprise from my husband before a work trip—soft, golden, and full of love. That thoughtful gift inspired a family favorite we now bake together often.
- Total Time: 0 hours
- Yield: 10–12 1x
Ingredients
Equipment
- Kitchen aid *See notes (if you don’t have a kitchen aid)
- 2–3 baking sheets
- parchment paper
Ingredients
- 1 1/2 cups lukewarm water (95–105 degrees)
- 1 rapid rising yeast packet (2 1/4 tsp)
- 2 TB sugar or maple sugar for proofing yeast
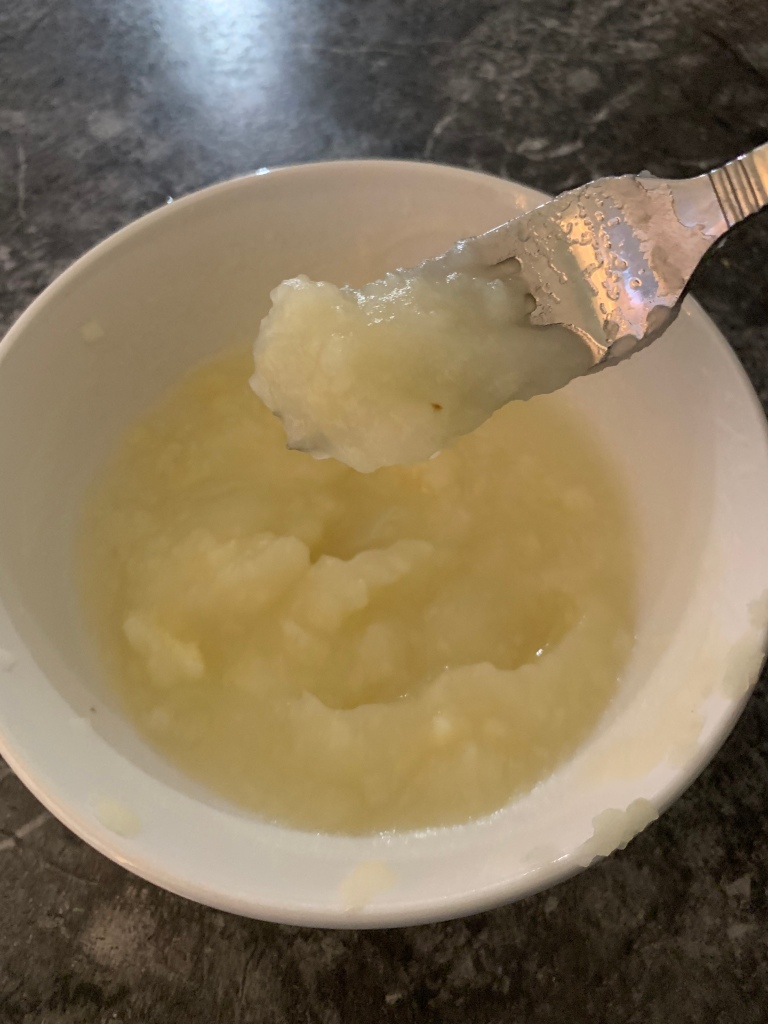
- 1/2 cup potato water (1 medium sized potato & 1 cup water) ***See Notes
- 2 TB vegan butter (or homemade), softened
- 1/4 cup applesauce
- 4 cups gf all purpose flour, (if xantham gum free, which is usually derived from corn) use rice flour & 1/2 tsp guar gum & 1 TB tapioca starch
- 1/4 cup sugar
- 1 tsp salt
- 10 raisins, for bear eyes

Instructions
- Preheat your oven to 375°F (190°C).
- Activate the yeast: In a small bowl, combine lukewarm water (95–105°F) and sugar. Sprinkle in the yeast and let it sit for 15 minutes. It should become foamy with a layer about 1/8 inch thick.
If it doesn’t foam, your yeast may be expired or the water too hot—discard and try again with fresh yeast and properly warmed water. - Mix the dough: In a stand mixer or large bowl, add all ingredients and mix until the dough is smooth. It should be very sticky and gooey, but not runny.
If the dough is too dry (meaning you can form it into a ball), add 1–2 tablespoons of water or non-dairy milk until you reach the right consistency—like in the picture below.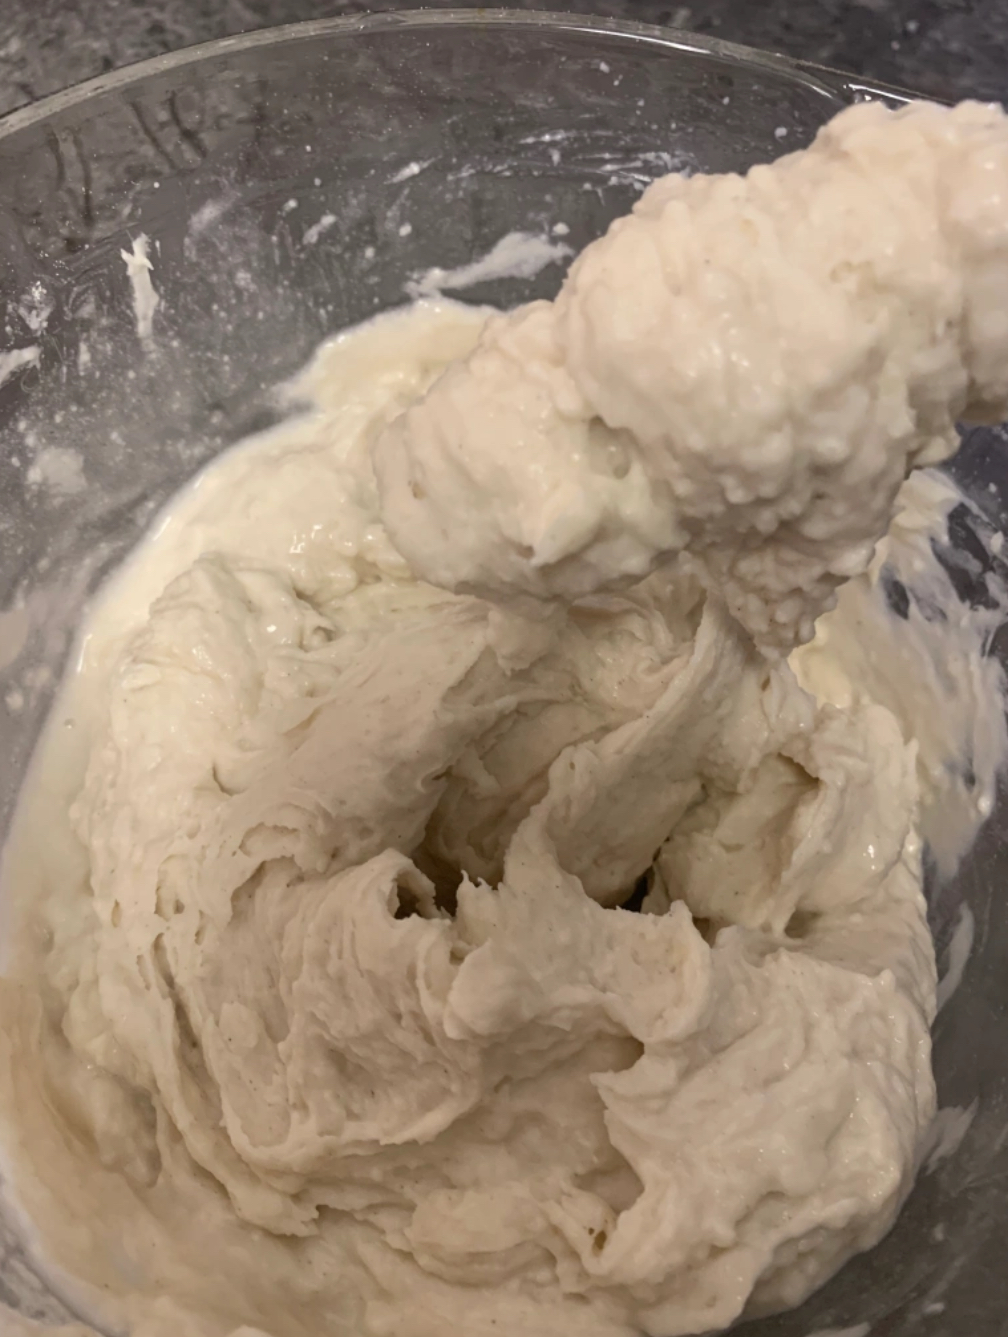
- No rising needed! This dough does not need to rise (in fact, letting it rise will make the bears go flat). Instead, scoop the sticky dough directly onto floured parchment paper.
- Divide the dough: Separate the dough into 10–12 equal portions. Each one will become a bready bear.
- Shape your bears:
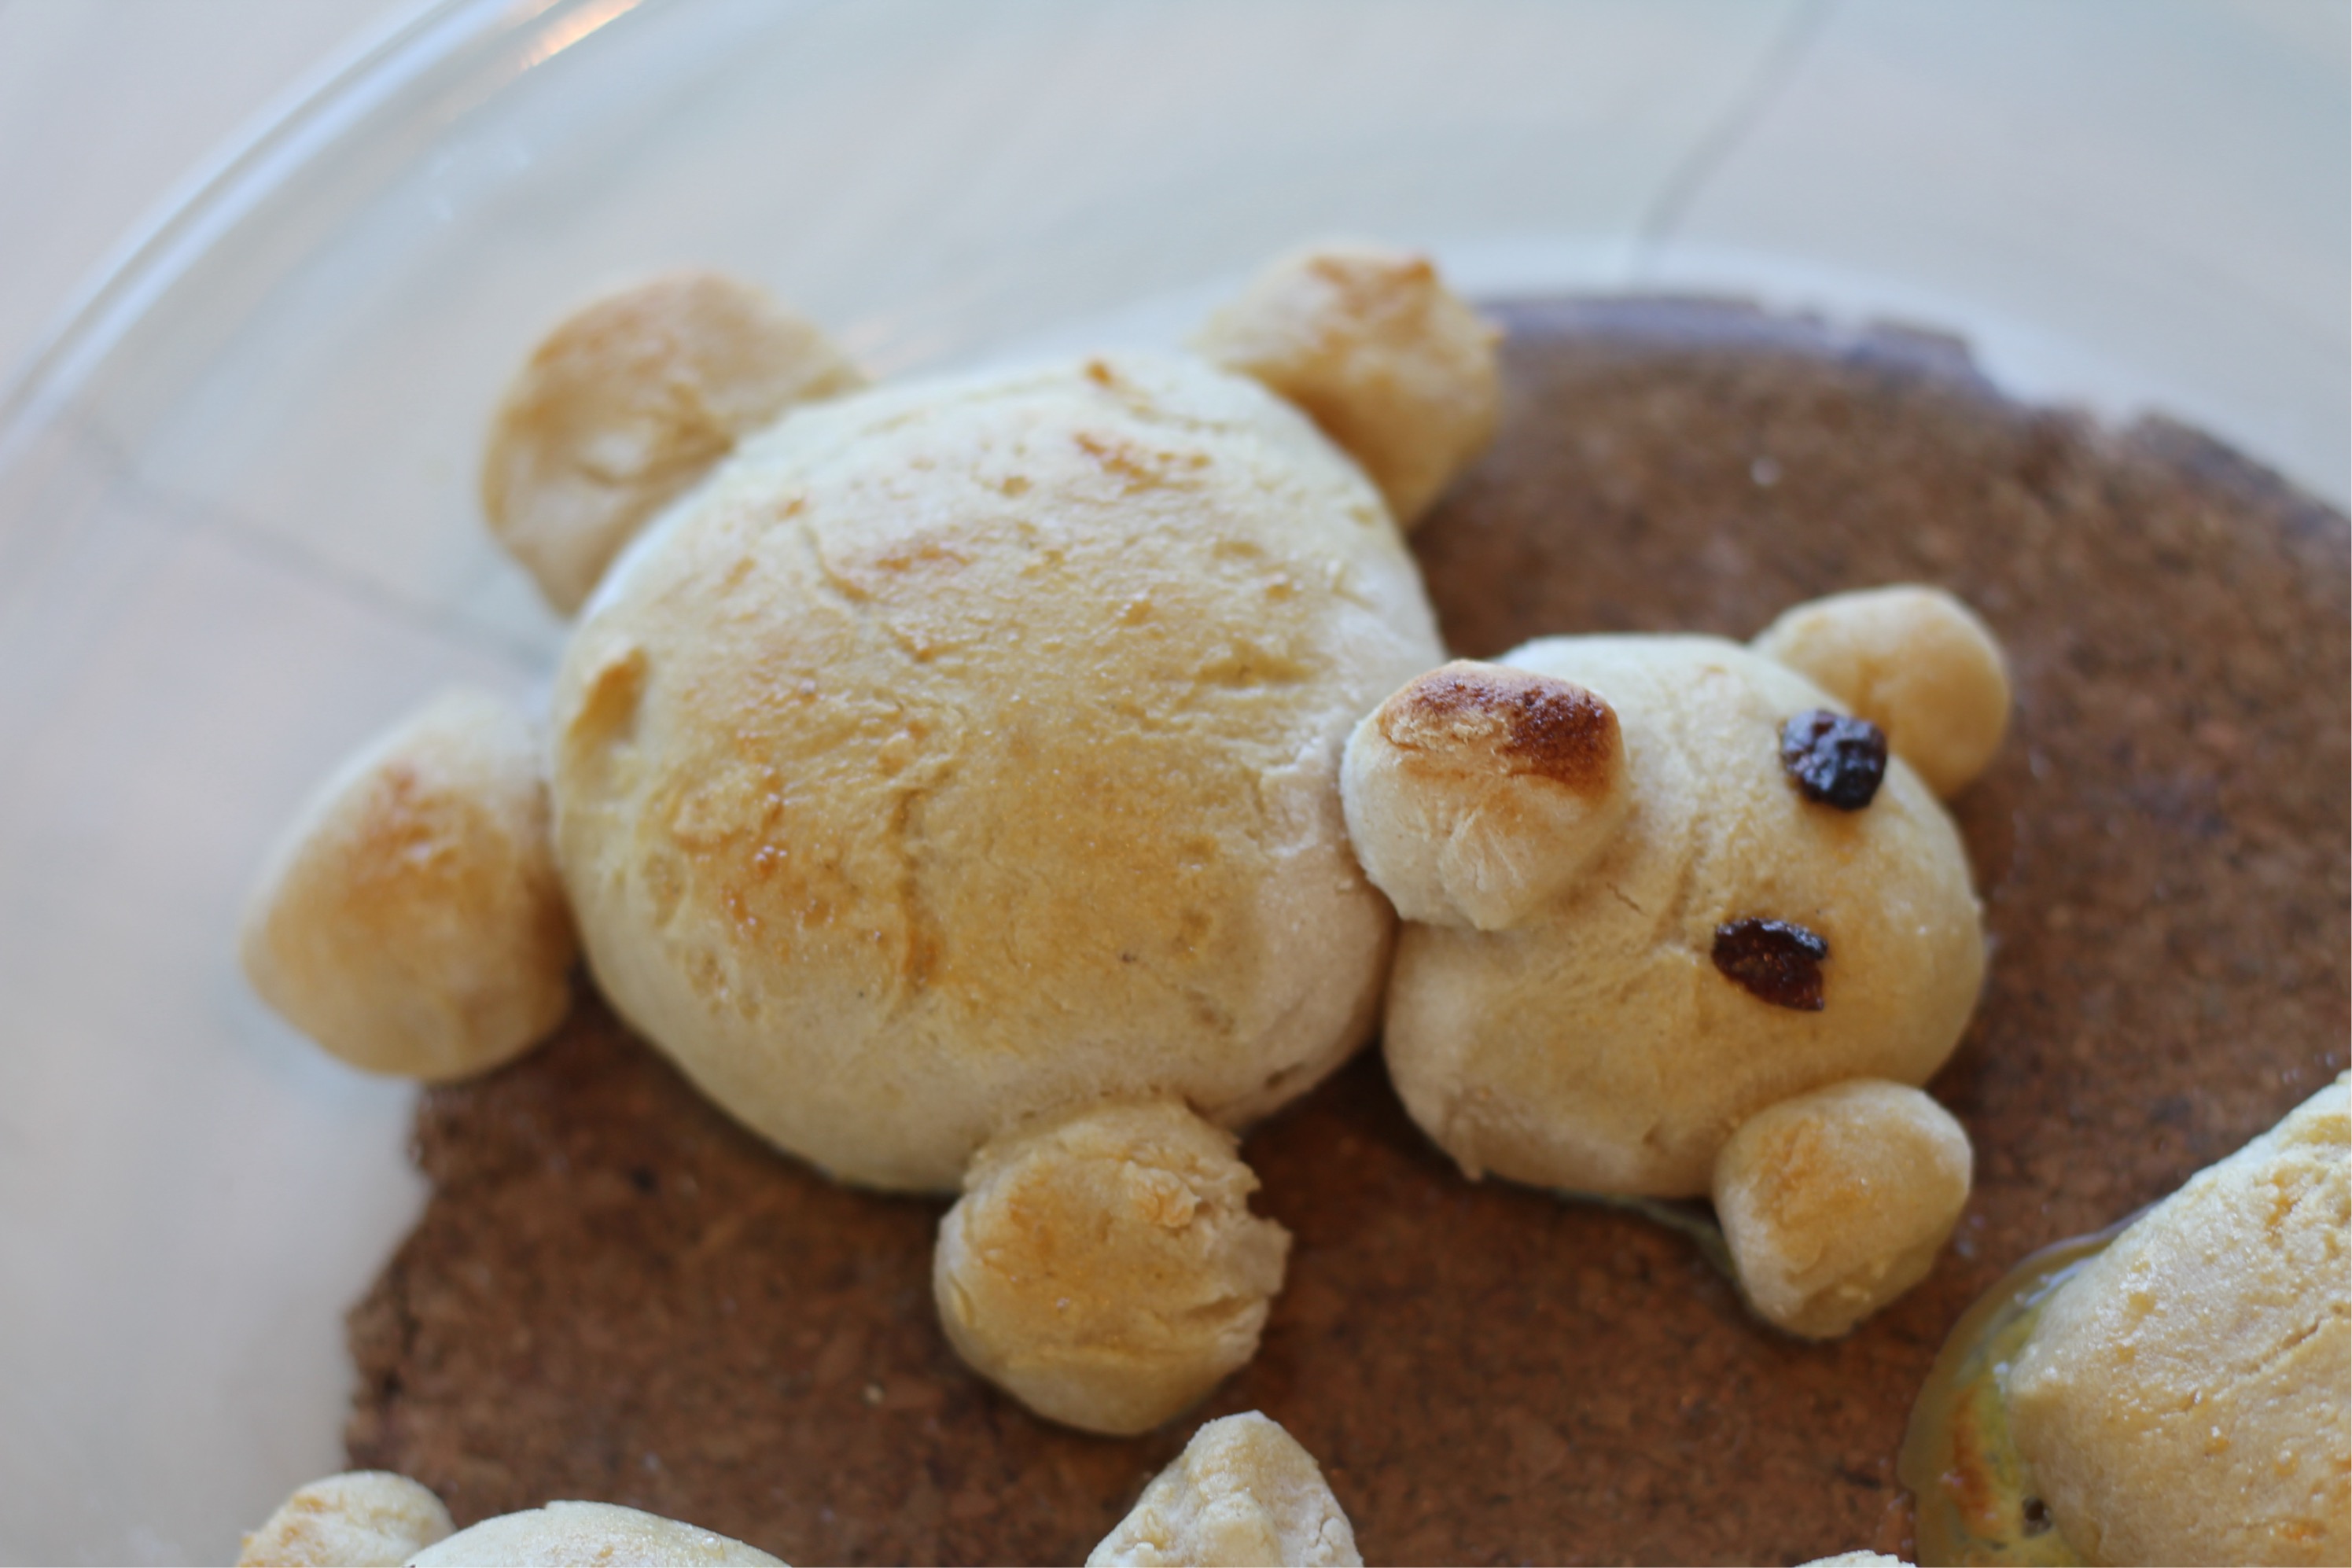
-Lightly flour one dough ball to work with. Divide it into 2 parts. From one half, form 1 medium circle for the head, and 7 small balls for 2 legs and 2 arms, 2 ears, and 1 tiny ball for the nose.
-Use the final half to make a large circle for the body. - Cut raisins in half and use them for eyes.
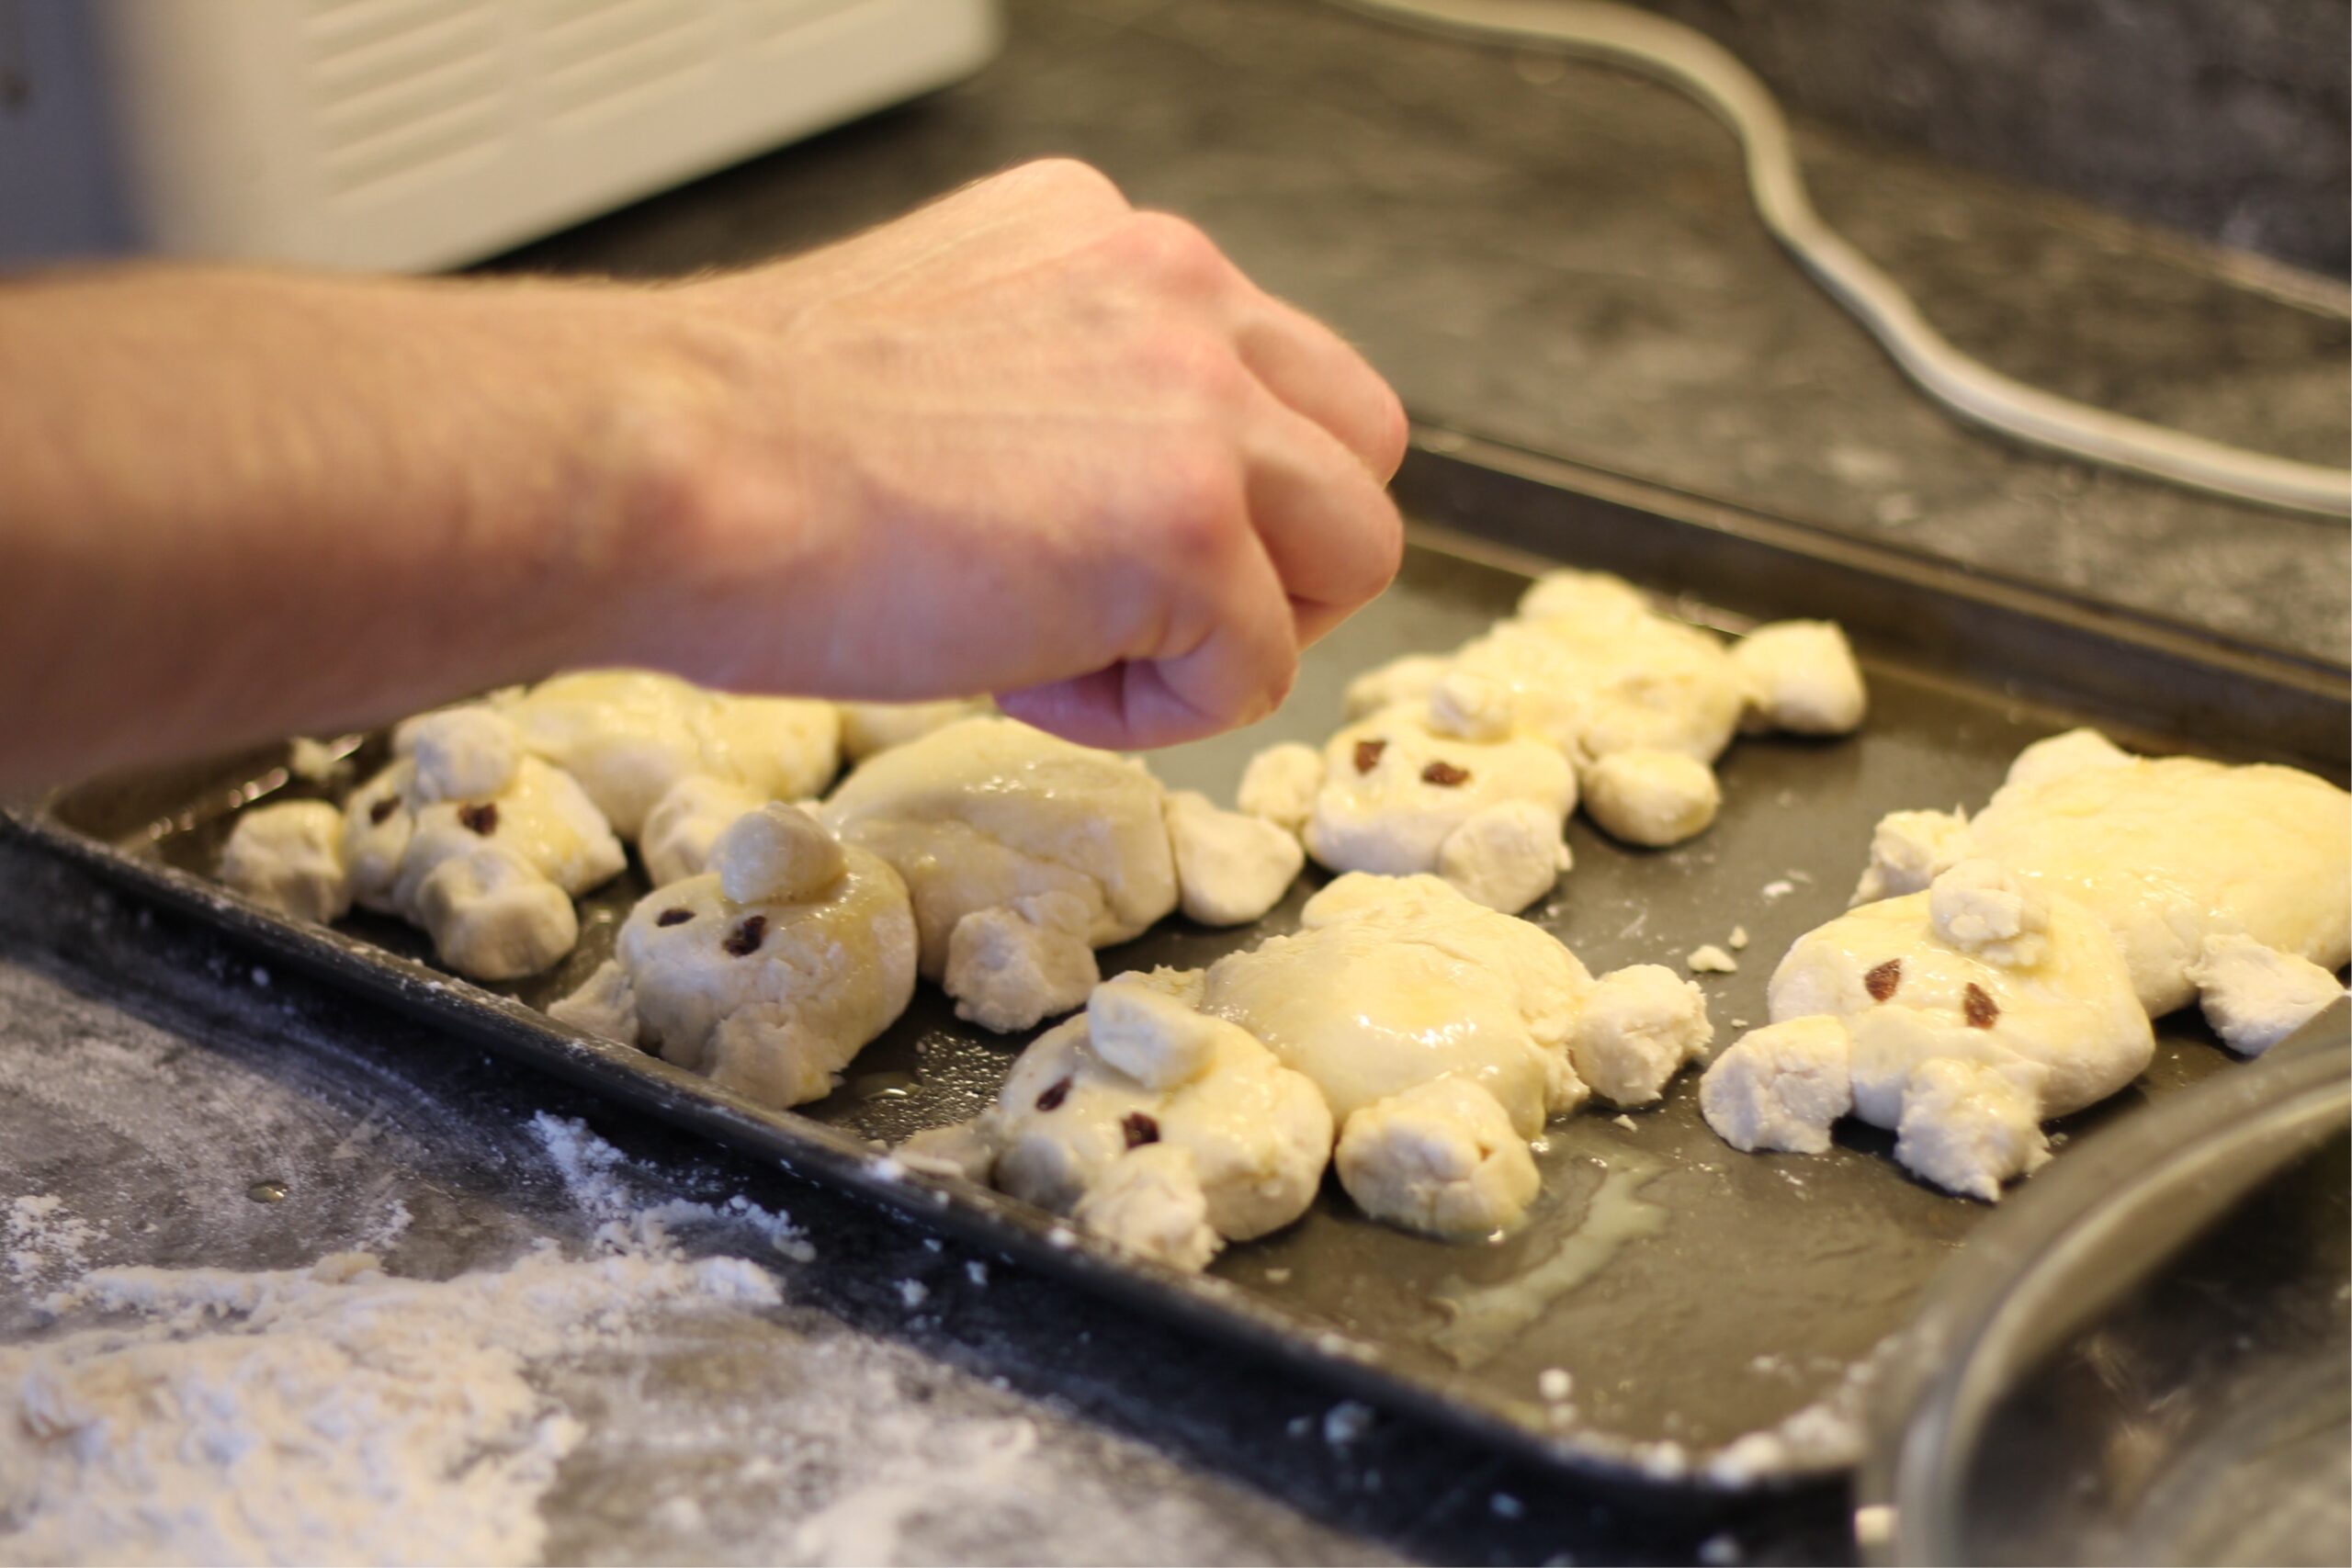
- Assemble the bears on a parchment-lined baking sheet (leave about ½ inch between each one).
Note: If you’re out of parchment paper and use an oiled pan instead, they may stick—but they’ll still be cute! - Stick them together: Gently press each dough piece together so they hold their shape during baking. Brush the tops with Just Egg or a soy-free vegan butter for a golden finish.
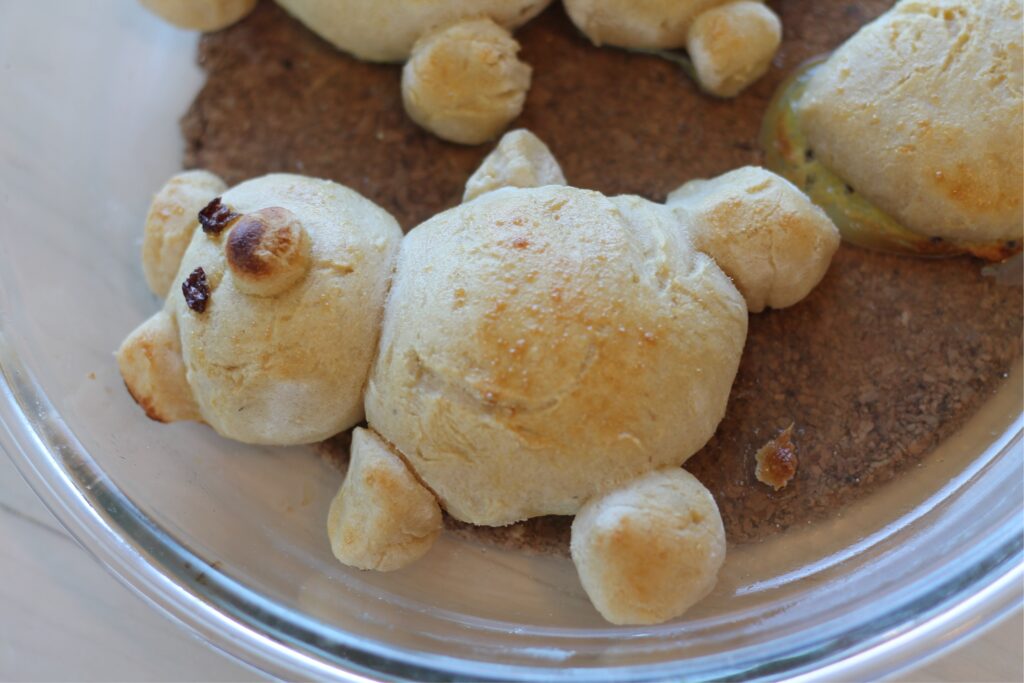
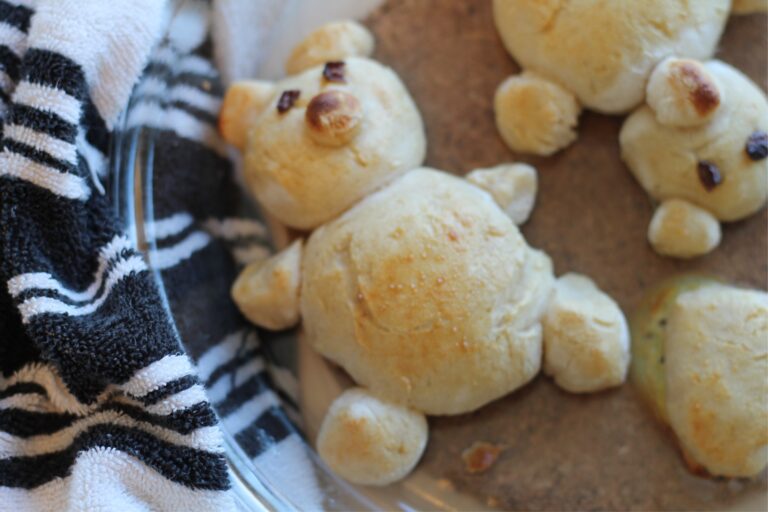
- Bake for 30–35 minutes, or until the internal temperature reaches 205–210°F.
- Cool in the pan for about 10 minutes before enjoying.
- Store any leftovers in an airtight container in the fridge.
Notes
*If you don’t have a kitchen aid, you can mix by hand, but your bread will come out more dense. You really have to whisk your mixture hard when mixing by hand to get a good finished product. Kitchen aid is definitely a better option for this recipe.
*** Instead of using non dairy milk like most bread recipes, I like to use 1/2 cup potato water. (You can also use sweet potatoes or applesauce if nightshades are an issue; but it will not rise as much). The potato water makes the final product taller, fluffier, and moist. To achieve this potato water, I mash up one small boiled potato with 1 cup water until you get a mushy runny paste (kinda like applesauce). I then use 1/2 cup of this mixture in the recipe. See picture below for the right consistency:
- Prep Time: 15
- Cook Time: 30-35