
Homemade Gluten-Free Seashell Pasta
There is something special about shaping your own pasta. It feels like connecting with an old tradition, even when the recipe itself is modern. This seashell-style gluten-free pasta starts with simple ingredients: a flour blend, light psyllium husk, olive oil, salt, and warm water. Together, they create a dough that is soft but strong enough to shape. At first, the dough looks plain, rolled into logs and cut into small pieces. But as you roll and press, each piece curls into a seashell shape. The ridges catch sauce beautifully, and the hollow centers hold broth or filling. They are perfect for baking, soups, or simple weeknight meals.
How Seashell Pasta Came to Be
Shell-shaped pasta, often called conchiglie in Italian, has been enjoyed for centuries. Pasta itself has a long history. Noodles first appeared in ancient China, with archaeological finds in the Lajia site showing millet noodles from nearly 4,000 years ago (Emory University blog). From there, the idea of noodles traveled and transformed. By the Middle Ages, pasta had become central to Italian cooking, shaped into forms that fit local tastes and cooking styles.
Shell pasta likely evolved because of its usefulness. The curved shape makes it excellent at holding thicker sauces, while the hollow space inside traps flavor. It became popular in Italian kitchens and later spread worldwide. Today, gluten-free cooks adapt this traditional shape with modern flours and binders. Psyllium husk and xanthan gum mimic the gluten that gives regular pasta its stretch. That way, even without wheat, you can make pasta shells that stay together and hold up in cooking. (Kikkoman Food Culture Institute)
Ingredients and Substitutions
Ingredients you will need:
- gluten-free all-purpose flour blend (with xanthan gum included)
- warm water
- psyllium husk (powder or whole husks)
- olive oil
- salt
Possible substitutions:
- Flour blend: Any good gluten-free blend works if it contains a binder like xanthan gum. If not, add 1 teaspoon xanthan gum yourself.
- Light Psyllium husk: Chia gel or ground flax mixed with water can be used, but the texture will be less elastic.
- Olive oil: Swap for avocado oil, grapeseed oil, or melted coconut oil.
- Salt: Sea salt or kosher salt gives the best flavor, but regular table salt works too.
Step-by-Step Guide to Making Seashell Pasta
In a small bowl, stir light psyllium husk into warm water. Let it sit for 2–3 minutes until it forms a gel.
In a large mixing bowl, combine the gluten-free flour blend and salt.
Add the psyllium gel and olive oil to the flour. Mix until a dough forms.
Check the dough. If it feels dry or crumbly, add warm water a tablespoon at a time. If sticky, add a sprinkle of flour.
Knead the dough gently until smooth.
Cover the dough and rest for 20–30 minutes. This lets the flour hydrate fully.
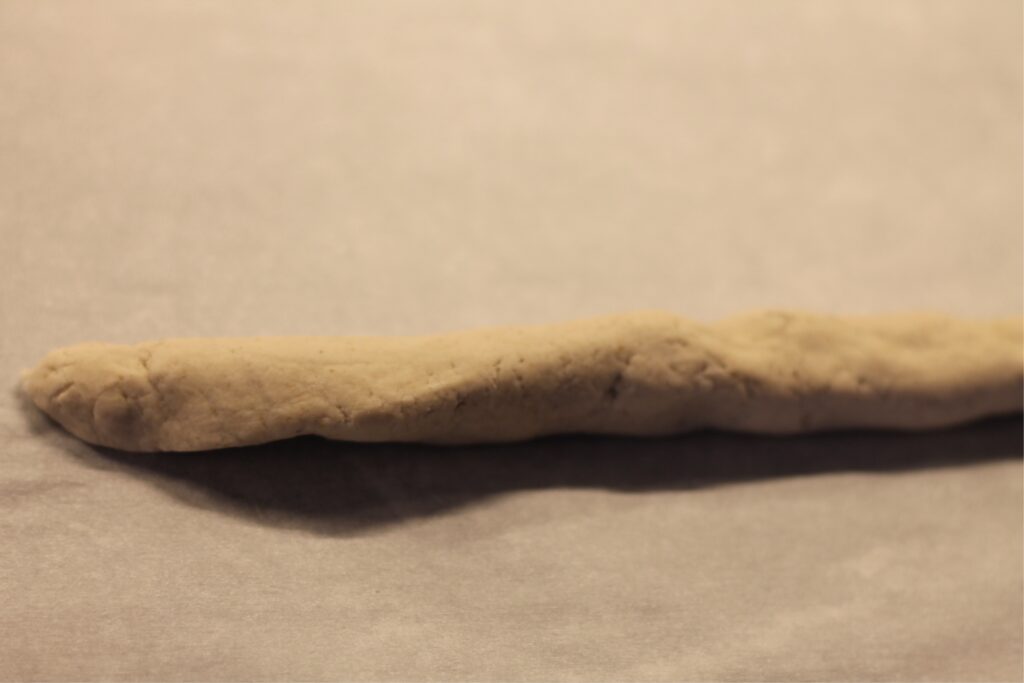
Roll the dough into three long logs, each about 1 inch thick.
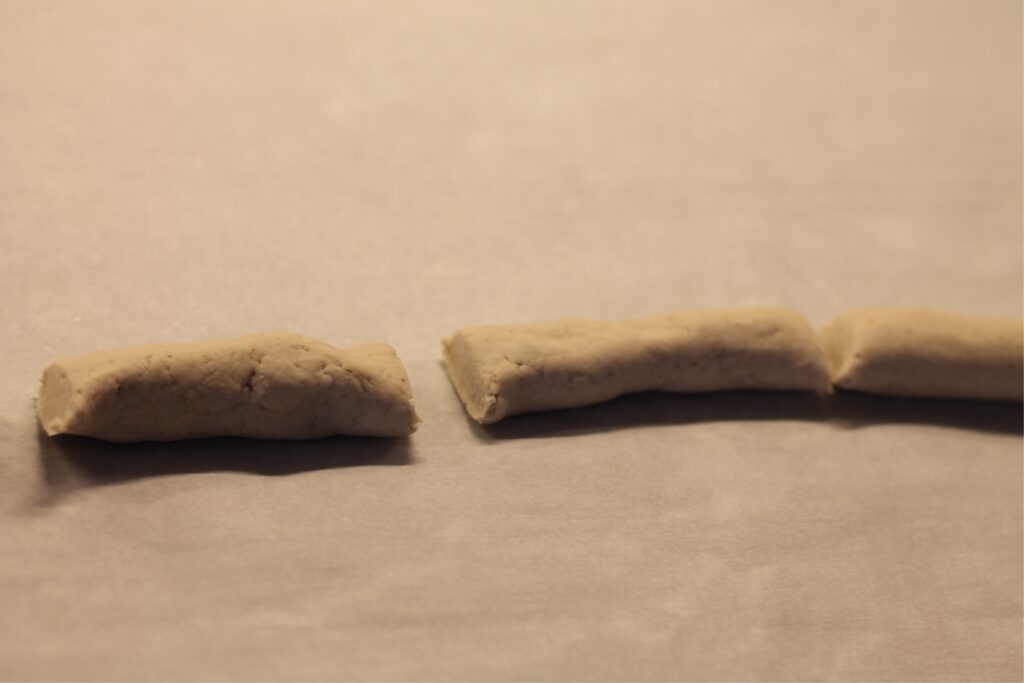
Cut each log into pieces about 3 inches long.
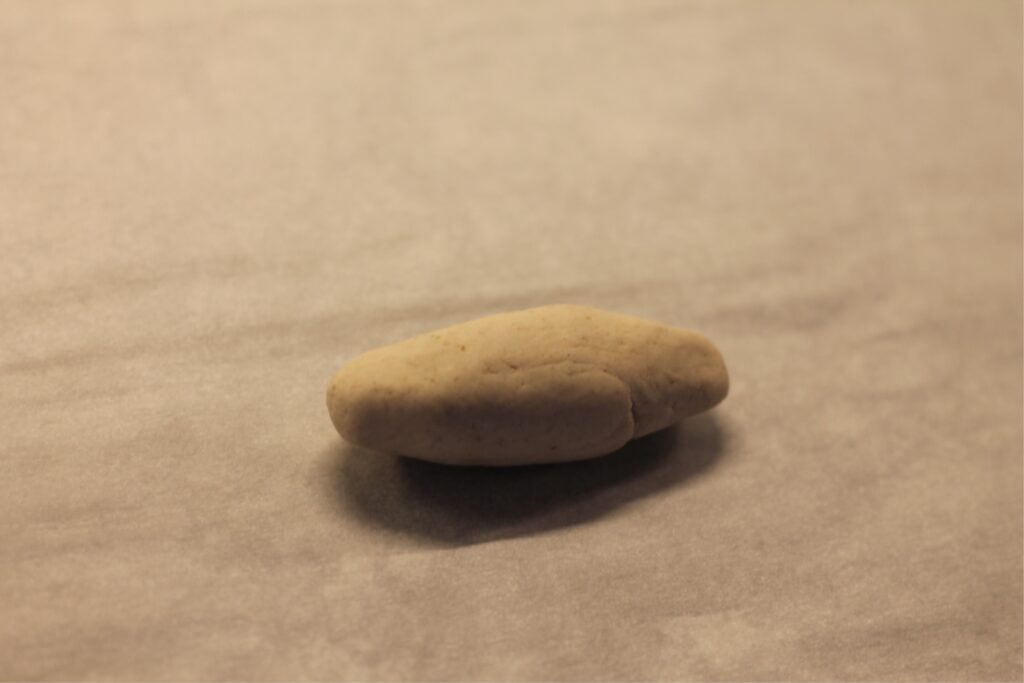
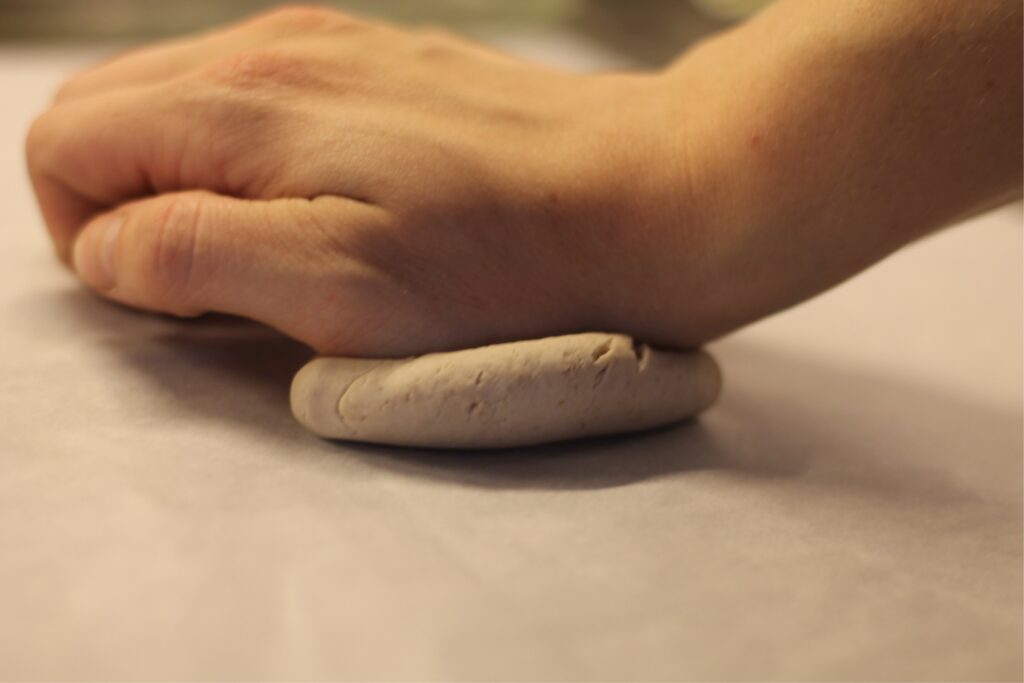
Roll one piece into a short oval or torpedo shape. Place it under your palm, press gently, and roll it away from you. Flip it, press again, and roll once more.
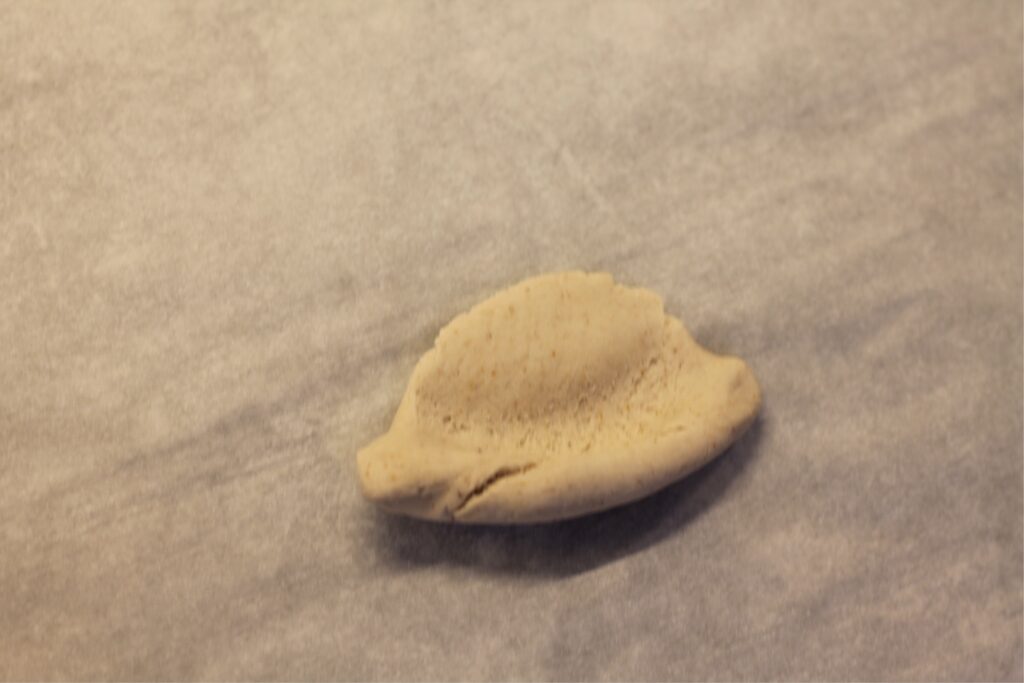
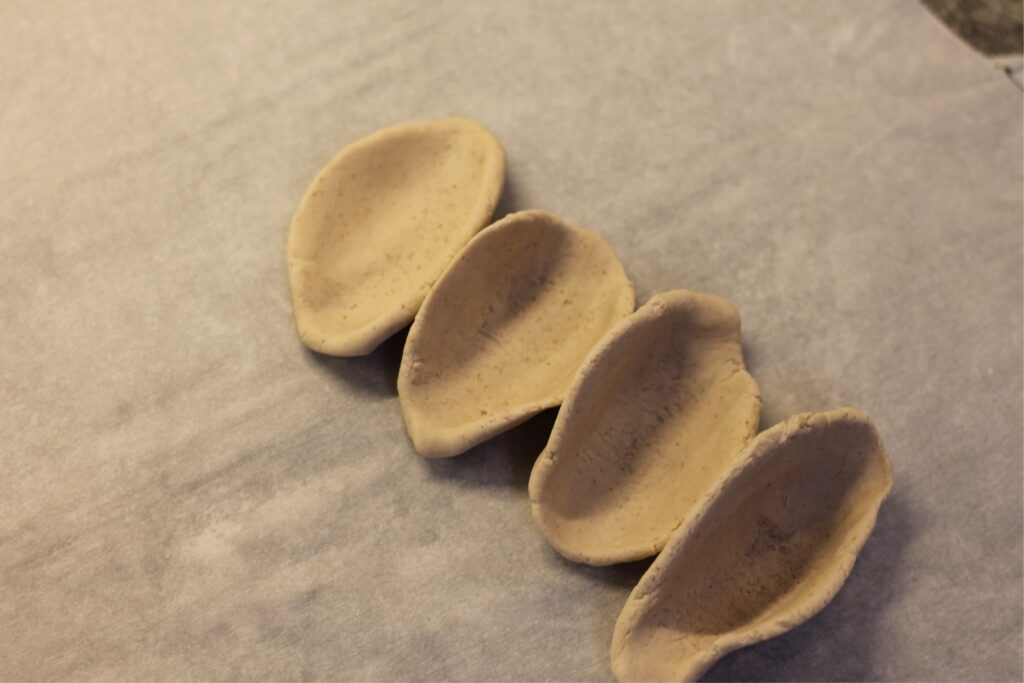
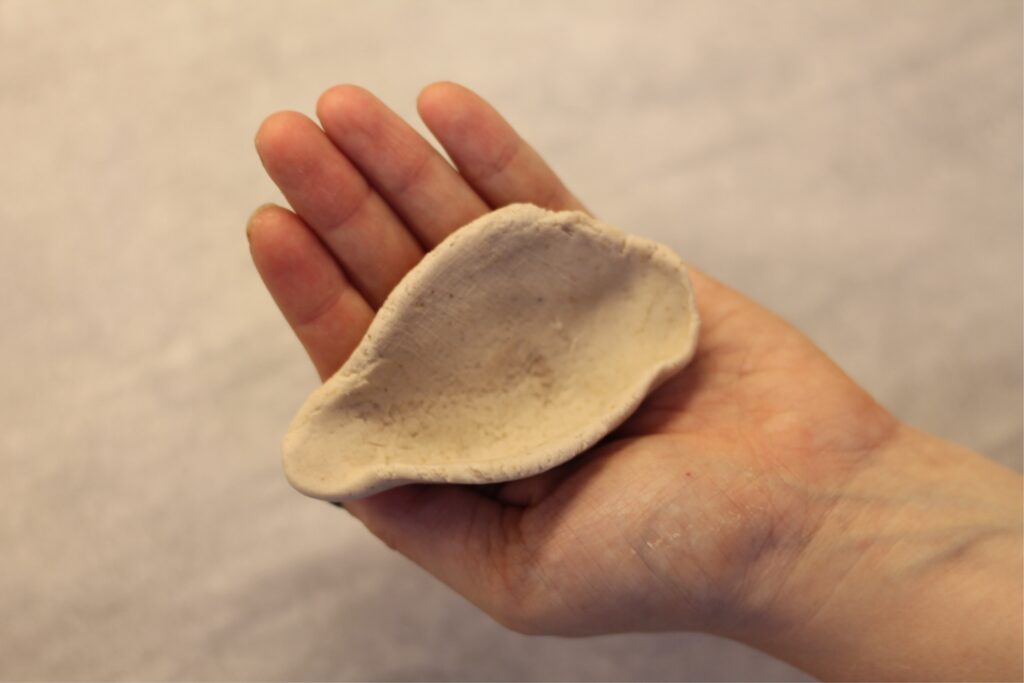
Pinch the edges slightly, then use your fingers or the side of your hand to curve it into a seashell shape. The hollow forms in the center as you bend and press.
Stand each shaped shell on a tray. Continue with the rest of the dough.
To cook, bring salted water to a boil. Drop in the shells and cook for 3–5 minutes, until tender but not mushy. Drain and serve immediately with your favorite sauce.
Frequently Asked Questions
Q: How do I stop the dough from cracking?
A: If cracks form, the dough is too dry. Add a tiny splash of warm water and knead again. Resting the dough helps moisture spread evenly, so don’t skip that step.
Q: Can I freeze the pasta shells?
A: Yes. Arrange them on a baking sheet, freeze until solid, then transfer to a freezer bag. Boil straight from frozen when ready to use.
Q: What if I don’t have psyllium husk?
A: Psyllium is best for elasticity, but chia gel can work. Use 1 tablespoon finely ground chia mixed with 3 tablespoons warm water, then let it sit until thick.
Q: Can I dry these shells for storage?
A: Air drying works, but gluten-free dough may not harden as much as wheat pasta. Store dried shells in an airtight container for up to a week, or freeze for longer keeping.
Q: Which sauces pair best with seashell pasta?
A: Their curves and hollows make them great with chunky sauces like marinara, pesto with veggies, or creamy cheese sauces. They also shine in baked pasta dishes with tomato sauce and melted cheese.
Q: Do these shells taste like regular wheat pasta?
A: The flavor is slightly different because of the gluten-free flour blend, but the texture is satisfying and chewy. Most people find the shells delicious once sauced or baked.
Making seashell pasta at home feels rewarding. Each little shell you shape by hand becomes a vessel for flavor. They look rustic, taste comforting, and connect you with the long tradition of pasta-making around the world. Plus, they give gluten-free eaters a chance to enjoy a classic food in a new way.
Print
Vegan Jumbo Pasta Shells (Gluten, Soy, & Nut Free)
Ingredients
- 2 cups (240 g) gluten-free all-purpose Namaste flour blend (with xanthan gum included)
- ½ cup + 3 tbsp warm water (start with ½ cup, add more as needed)
- 1 tbsp light psyllium husk powder (or 3 tbsp whole husks; if you use regular psyllium you will have purple noodles)
- 2 tbsp olive oil (plus 1 more tbsp if dough feels dry)
- ½ tsp salt
Instructions
- In a small bowl, mix psyllium husk with warm water. Let sit 2–3 minutes until it forms a gel.
- In a large bowl, combine flour and salt.
- Add the psyllium gel and olive oil. Mix until a dough forms.
- If the dough is dry, add warm water 1 tablespoon at a time. If sticky, add a little flour.
- Knead gently until smooth.
- Cover and rest 20–30 minutes.
- Roll dough into three logs, about 1 inch thick. Cut into 3-inch pieces.
- Roll each piece into a torpedo shape.
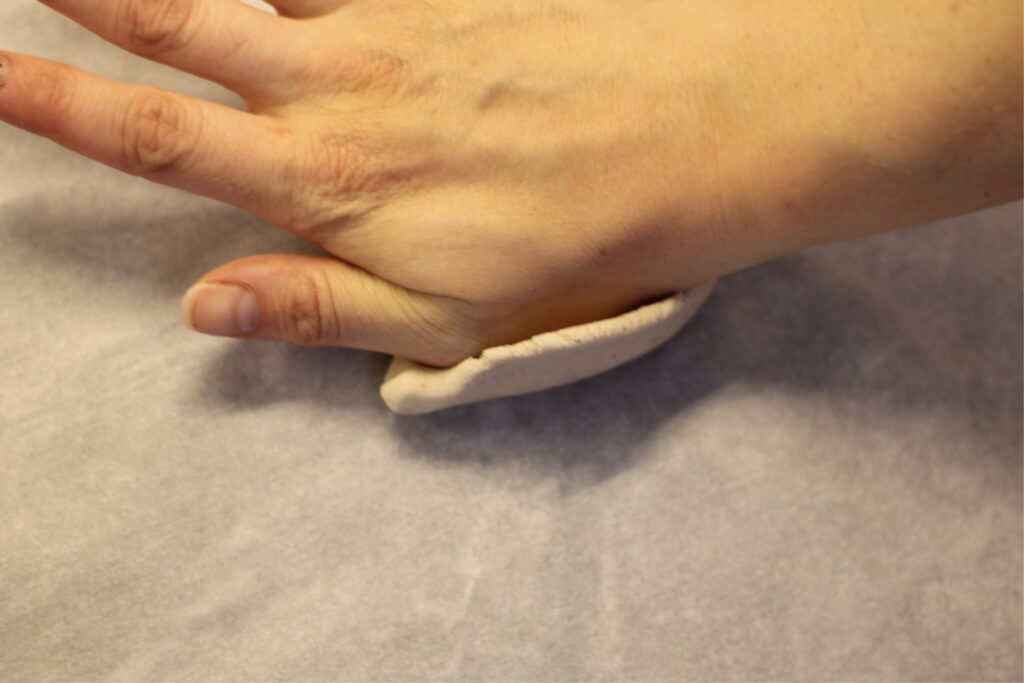
- Place one piece under your hand, press gently, and roll away from you.
- Flip it around, press again, and roll away from you.
- Pinch the thick edges with your fingers, then stand the noodle upright on a tray.
- Repeat with the rest of the dough.