
Vegan Chocolate Sheet Cake
I love this vegan chocolate sheet cake!! It’s so good! It can also be made corn & legume free. Makes one 16×24” sheet cake. Takes about 20 mins prep and 40 mins in the oven. If you’re looking for a vanilla round cake, you can find it here.
History of Cakes
When creating cake recipes, I got really curious about the history of this dearly loved dessert. I was amazed to learn that cakes have been made since the time of the Egyptians! Over the course of thousands of years, the recipe for cakes slowly morphed into what we know as a “cake” today! The Greeks, in particular, started adding in leavening agents and butter to make the texture of the cake fluffier, similar to our current recipes. If you want to find out more about the history of title, here is where I found my information!
This post may contain affiliate links. See full disclosure HERE.
Ingredients & Substitutes
- 3 cups non-dairy milk
- 1 1/2 cups melted vegan butter, or homemade oat butter
- 2 cups unsweetened applesauce (2/3 cup × 3 = 2 cups)
- 3 cups boiling water
- 3 TB apple cider vinegar
- 3 TB vanilla extract
- 6 cups gluten-free flour
- 5 1/4 cups sugar (1 3/4 cups × 3 = 5 1/4 cups)
- 2 1/4 cups cocoa powder (3/4 cup × 3 = 2 1/4 cups)
- 6 tsp baking powder, OR if corn free use your preferred alternative (2 tsp × 3)
- 4 1/2 tsp baking soda (1 1/2 tsp × 3)
- 3 tsp salt
- 4 batches of homemade vegan chocolate ganache, vegan chocolate mousse, or other desired filling
- 4 batches of homemade chocolate buttercream frosting, OR vanilla buttercream frosting
How to Make Vegan Chocolate Sheet Cake
Preheat oven to 350
In an extra large 7-8 quart kitchen aid or using a hand mixer in an extra large bowl, mix all wet ingredients, then gradually add in dry ingredients till mixture is not clumpy. If you have a 6 quart kitchen aid, I recommend adding in half of all ingredients and making two batches. Otherwise, you will have too much batter for your kitchen aid.
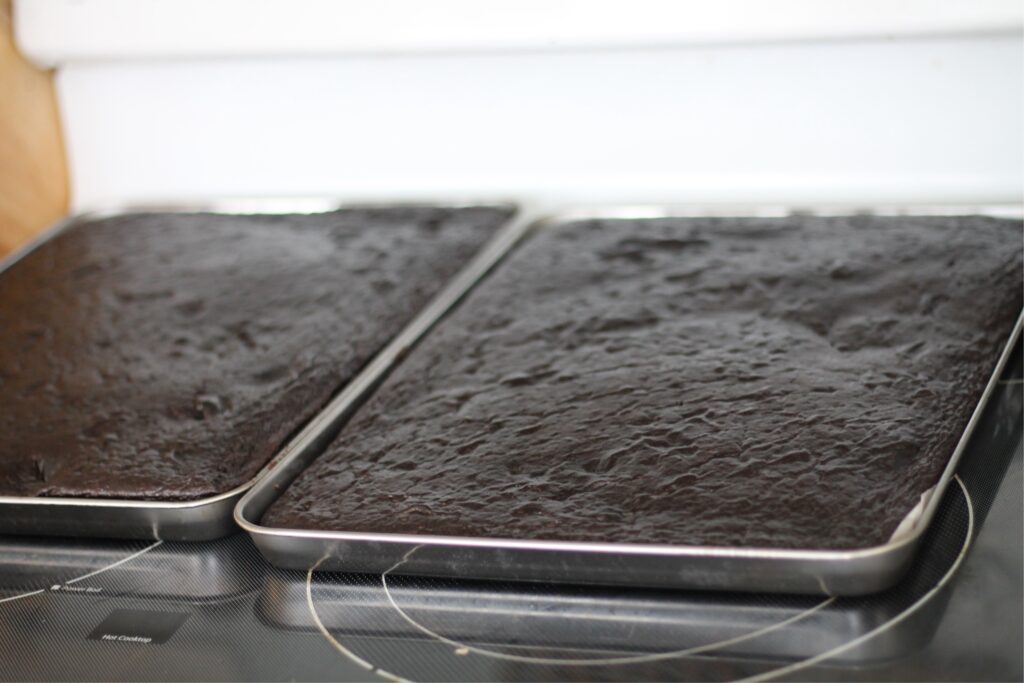
Pour 1050g of mixture into each of the 4 parchment lined baking sheets that measure 16×12” by 1 inch tall.
Bake for 35-40 mins, or till toothpick comes out clean in the center, or till temperature of cakes is 210F in the center.
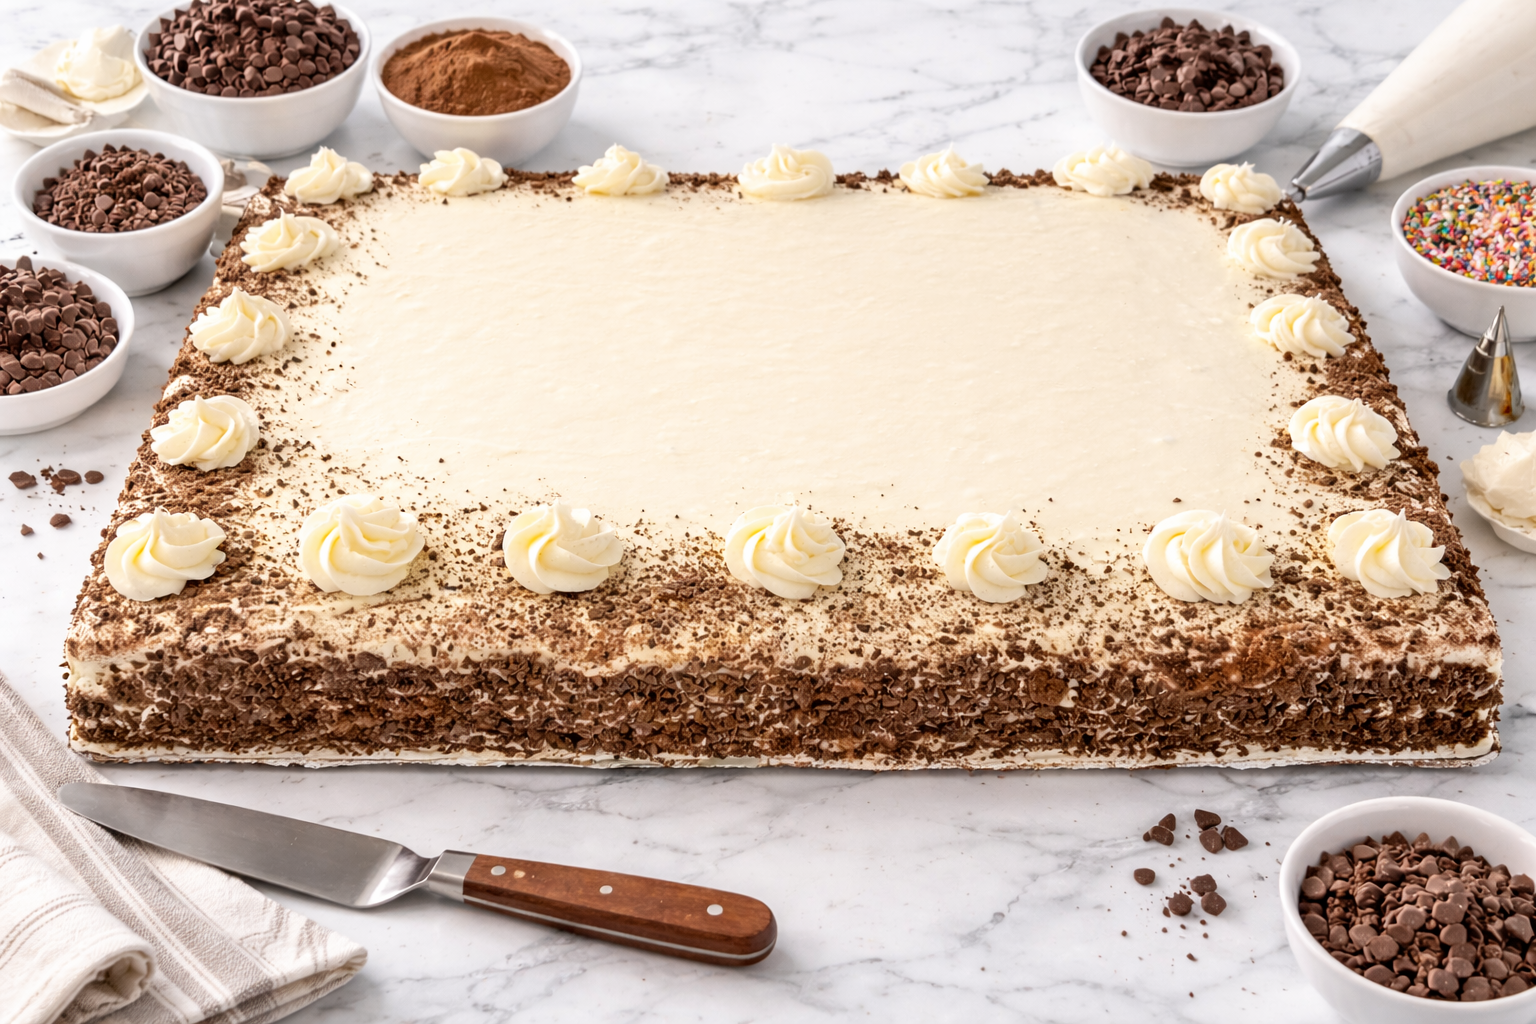
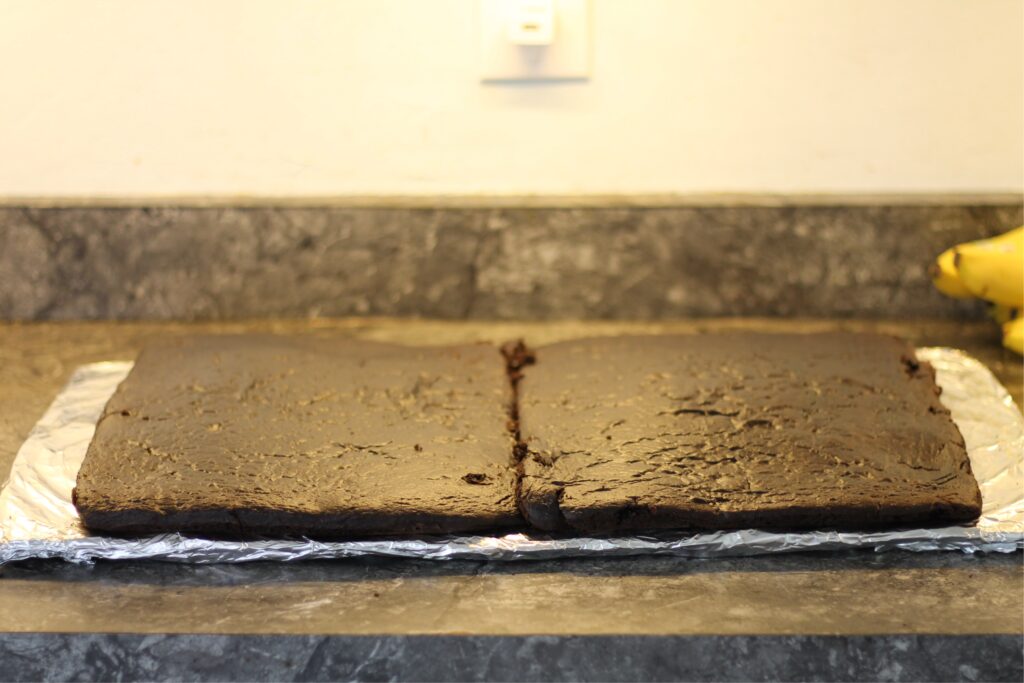
Let cakes cool for one hour & then move them to a cake board & frost them, as desired. I set two cake pieces next to each other and then put filling on those & then stack two more cake pieces on top & frost the outer design.
Pro Tips
- It is super important with this recipe to follow the directions carefully! By that, I mean using a food scale! This is how you can achieve perfect results every single time!
- DON’T take the cake out, when it “looks” done! I know some recipes may use this language to describe when the cake is cooked and ready. But for this recipe, it is very important to check the middle of the cake with a food thermometer to assure that the middle of the cake is fully cooked to 210F.
Common Questions
- Can I use a hand mixer for this recipe? While you can use a hand mixer, I find that using an extra large kitchen aid makes the batter less likely to clump! In fact, for pretty much all allergy friendly recipes, I prefer my kitchen aid over my hand mixer, because the kitchen aid helps whip up the ingredients to create a fluffier, less dense result.
However, if your kitchen aid is not the commercial sized one, your ingredients may barely fit in your kitchen aid. - Should I store the cake in the fridge or on the counter? I find that the best way to store this cake is on the counter. However, when I make a cake a day or two in advance, I usually store it in the fridge and take it out the morning we plan to eat the cake, and let it come to room temperature for a few hours. Because these allergy friendly ingredients harden in the fridge, your cake will have a more dense texture if you eat it at fridge temperature. I much prefer to retain its fluffy texture.
Other Favorite Allergy Friendly Dessert Recipes
- Vanilla Cake (Vegan; Gluten, Soy, Nut Free)
- Vegan Cheesecake (Gluten, Soy & Nut Free)
- Vegan Cinnamon Rolls (Gluten, Soy & Nut Free)


Vegan Chocolate Sheet Cake—Full Size (Gluten, Soy, Nut Free)
Ingredients
- 3 cups non-dairy milk
- 1 1/2 cups melted vegan butter, or homemade oat butter
- 2 cups unsweetened applesauce
- 3 cups boiling water
- 3 TB apple cider vinegar
- 3 TB vanilla extract
- 6 cups gluten-free flour
- 5 1/4 cups sugar (1 3/4 cups × 3 = 5 1/4 cups)
- 2 1/4 cups cocoa powder (3/4 cup × 3 = 2 1/4 cups)
- 6 tsp baking powder, OR if corn free use your preferred alternative (2 tsp × 3)
- 4 1/2 tsp baking soda (1 1/2 tsp × 3)
- 3 tsp salt
- 4 batches filling, of choice, we like using this chocolate mousse or ganache recipe
- 4 batches of homemade chocolate buttercream frosting, OR vanilla buttercream frosting
Instructions
- Preheat the Oven
Begin by setting your oven to 350°F (175°C) to ensure it’s ready when your batter is prepared. -
Prepare the Baking Pans
Next, line four 16×12-inch baking sheets (each 1 inch deep) with parchment paper. This will prevent the cake from sticking and make removal easier. -
Mix the Wet Ingredients
In an extra-large mixing bowl (7–8 quarts) or using a 7-8 qt. stand mixer, combine the following:-
3 cups non-dairy milk
-
1 1/2 cups melted vegan butter or homemade oat butter
-
2 cups unsweetened applesauce
-
3 cups boiling water
-
3 tablespoons apple cider vinegar
-
3 tablespoons vanilla extract
-
-
Incorporate the Dry Ingredients
Gradually add the following dry ingredients to the wet mixture, mixing until the batter is smooth and free of lumps:-
6 cups gluten-free flour
-
5 1/4 cups sugar
-
2 1/4 cups cocoa powder
-
6 teaspoons baking powder (or a corn-free alternative)
-
4 1/2 teaspoons baking soda
-
3 teaspoons salt
Note: If using a 6-quart mixer, consider halving the recipe and preparing it in two batches to prevent overflow.
-
-
Divide the Batter
Then, evenly distribute 1,050 grams of the batter into each of the prepared baking sheets. Using a kitchen scale can help ensure accuracy. -
Bake the Cakes
After that, place the pans in the preheated oven and bake for 35–40 minutes. The cakes are done when a toothpick inserted into the center comes out clean or when the internal temperature reaches 210°F (99°C). -
Cool the Cakes
Once baked, remove the cakes from the oven and allow them to cool in the pans for one hour. This helps set the structure and makes them easier to handle. -
Assemble the Cake Layers
Carefully transfer the cooled cakes onto cake boards. Arrange two cake layers side by side, spread your chosen filling (such as vegan chocolate ganache or mousse) over them, then place the remaining two layers on top to create a double-layered sheet cake. -
Frost the Cake
Finally, apply your preferred frosting—either homemade chocolate buttercream or vanilla buttercream—over the assembled cake, decorating as desired.
Pro Tips:
-
Use a Kitchen Scale: For best results, measure your ingredients by weight to ensure consistency and accuracy.
-
Check Cake Doneness: Instead of relying solely on appearance, use a food thermometer to confirm that the center of the cake has reached 210°F (99°C) for proper baking.
-
Mixer Size Matters: If your stand mixer is smaller than 7 quarts, mix the batter in separate batches to prevent overflow and ensure thorough mixing.
-
Storage Recommendations: Store the finished cake at room temperature if consuming within a day. For longer storage, refrigerate and bring to room temperature before serving.