
Mini Eggless Quiches
Mini quiches are one of those timeless, crowd-pleasing dishes—but this version reimagines them in a way that works for almost everyone at the table. These mini eggless quiches are completely gluten-, dairy-, soy-, and nut-free, yet still rich, creamy, and packed with flavor. Whether you’re cooking for allergies, dietary preferences, or just looking for something new, this recipe proves you don’t need eggs or traditional dairy to create a classic.
What Is a Quiche?
The word “quiche” comes from the German word kuchen, meaning “cake.” It was popularized in the French region of Lorraine, where the classic quiche Lorraine was originally made with eggs, cream, and bacon baked into a pastry crust.
Traditionally, quiche is known for its silky egg custard filling. But modern cooking has opened the door to creative alternatives—like this eggless version that uses dairy-free ricotta and cornstarch to recreate that same soft, sliceable texture.
Why You’ll Love These Eggless Mini Quiches
These little bites check every box:
- Completely free of gluten, dairy, soy, and nuts
- Egg-free but still creamy and structured
- Perfect for brunch, meal prep, or parties
- Customizable with different fillings
- Kid-friendly and freezer-friendly
They’re especially great if you’re managing multiple food allergies but still want something that feels comforting and familiar.
The Secret to an Egg-Free Quiche That Works
Instead of eggs, this recipe relies on a combination of:
- Dairy-free ricotta for creaminess
- Cornstarch for structure and binding
- Baking powder for a light, slightly fluffy texture
- Nutritional yeast for a subtle “cheesy” depth
The result is surprisingly close to traditional quiche—soft, tender, and sliceable without being dense.
The Gluten-Free Crust
A good quiche starts with a solid crust. This one uses a gluten-free 1:1 flour blend (like Namaste) combined with dairy-free butter to create a flaky, tender base.
Cold butter and just enough water are key here—this helps mimic a traditional pastry texture without gluten. Once baked, the crust holds up beautifully to the creamy filling without becoming soggy.
Flavor Variations
One of the best parts of mini quiches is variety. This recipe includes two classic options:
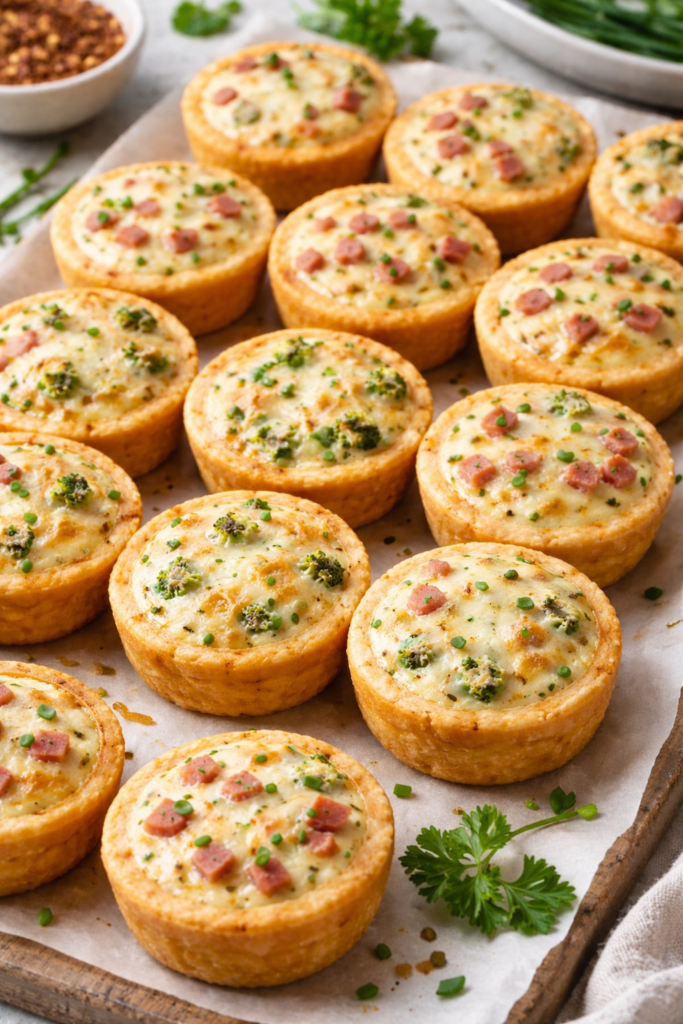
Broccoli Filling
A savory, slightly sweet combination of sautéed onion (or shallots) and finely chopped broccoli. Cooking the broccoli first ensures it blends seamlessly into the filling without excess moisture.
Ham Filling
Diced ham adds a rich, smoky flavor. You can enhance it with a pinch of smoked paprika or thyme for extra depth.
You can bake these as separate batches or mix and match in the same pan for a variety platter.
How to Make Mini Eggless Quiches
Start by preparing your crust. Mix the gluten-free flour and salt, then cut in the cold dairy-free butter until crumbly. Add cold water gradually until the dough comes together. Roll it out and press into a greased mini muffin tin.
For the filling, blend together the dairy-free ricotta, milk, cornstarch, seasonings, nutritional yeast, lemon juice, baking powder, and most of the shredded cheese until smooth.
Prepare your fillings:
- Sauté onion and mix with cooked broccoli
- Dice ham and season if desired
Spoon a small amount of filling into each crust (about 1½ tablespoons), then add your chosen mix-ins. Top with remaining dairy-free cheese.
Bake until set and lightly golden on top. Let them cool slightly before removing—they firm up as they sit.
Tips for Success
- Keep your crust ingredients cold for best texture
- Don’t overfill—mini quiches puff slightly as they bake
- Let them cool before removing to prevent breaking
- Finely chop fillings so they distribute evenly
Make-Ahead and Storage
These mini quiches are perfect for prepping ahead:
- Store in the fridge for up to 4 days
- Freeze for up to 2 months
- Reheat in the oven or air fryer for best texture
They’re ideal for busy mornings, lunchboxes, or quick snacks.
A New Take on a Classic
While traditional quiche relies heavily on eggs and cream, this version shows how adaptable the dish really is. With a few thoughtful substitutions, you can recreate the same comforting experience in a way that fits modern dietary needs.
Whether you’re serving them at brunch, bringing them to a gathering, or just stocking your freezer, these mini eggless quiches are proof that “free-from” food can still be full of flavor.

Mini Eggless Quiches (Dairy, Gluten, Soy, Nut Free)
Ingredients
Crust
- 4 cups gluten-free 1:1 flour blend, we like namaste
- 1 teaspoon salt
- 1 cup cold dairy-free butter, cubed
- 8–10 tablespoons cold water
Filling Base
- 8 cups dairy-free ricotta (store-bought or homemade)
- 2 cups unsweetened dairy-free milk (oat, almond, or soy)
- 1⅓ cups cornstarch
- 2 tablespoons garlic powder
- 2 tablespoons salt
- 2 teaspoons black pepper
- 2 teaspoons ground mustard
- 4 tablespoons nutritional yeast
- 4 tablespoons lemon juice or vinegar
- 2 tablespoons + 2 teaspoons baking powder
- 2 to 3 cups dairy-free shredded cheese, divided
Broccoli filling
- 4–6 cups broccoli, cooked and finely chopped
- 1 cup shallots or onion
- 2 tablespoons oil
Ham filling
- 3–4 cups diced ham
- Optional: smoked paprika or thyme
Instructions
- Preheat oven to 375°F and grease muffin pans.
- Mix flour and salt. Cut in dairy-free butter. Add water until dough forms. Press into 48 muffin cups.
- Sauté broccoli and shallots in oil until tender. Chop tiny.
- Whisk all filling base ingredients. Stir in about half the cheese.
- Divide filling base into two bowls.
Add broccoli to half and ham to the other half. - Fill each crust about ¾ full (about 1 tablespoon filling).
Top with remaining cheese. - Bake 25–30 minutes until set. Cool before removing.