
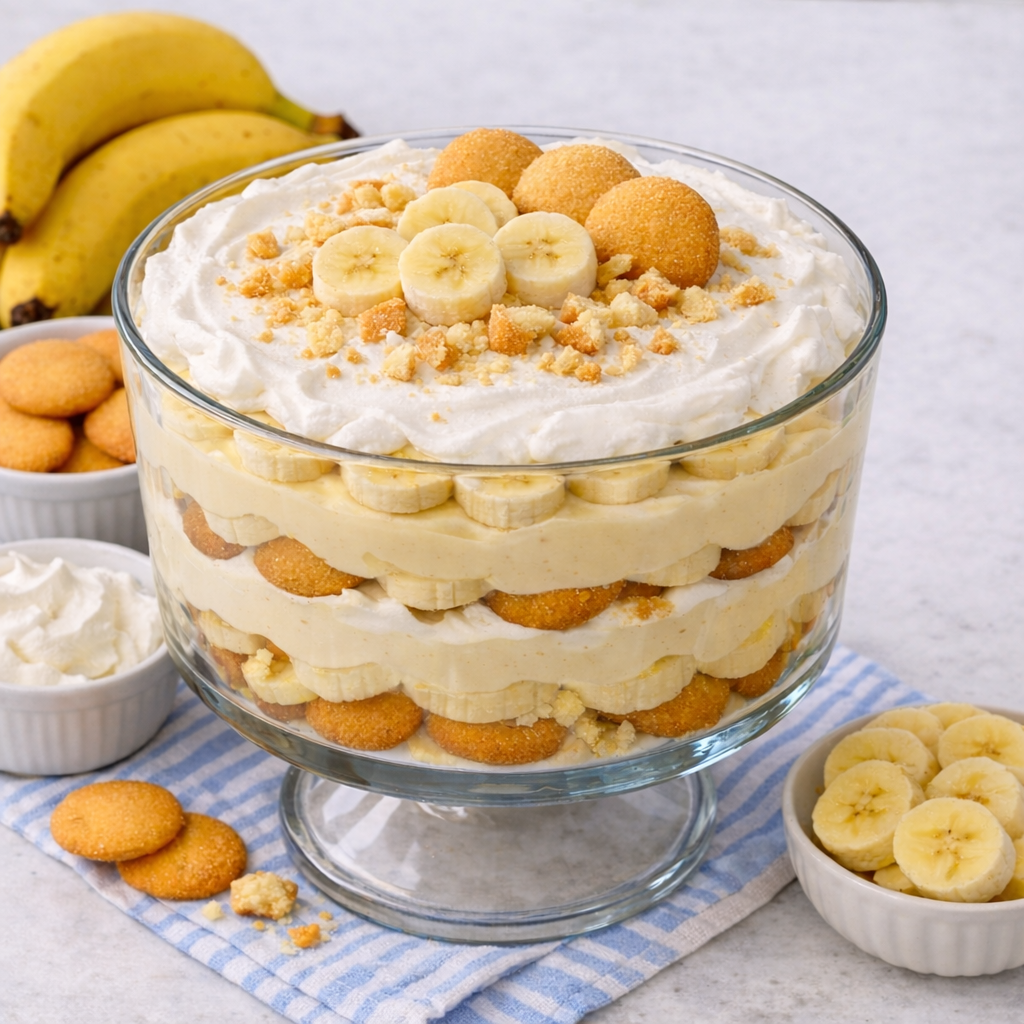
Top 9 Allergen-Free Banana Wafer Pudding (Gluten, Dairy, Nut-Free + Vegan)
If you’re looking for a dessert that feels nostalgic, indulgent, and completely safe for multiple food allergies, this allergen-free banana wafer pudding checks every box. Made with gluten-free, dairy-free, nut-free, and vegan ingredients, it delivers that classic creamy, layered comfort—without compromise.
Using simple store-bought shortcuts like vegan pudding mix and allergen-friendly wafers, this version is approachable enough for busy days but impressive enough for gatherings. Let’s walk through how to make it perfect every time, plus the top 9 tips that take it from good to unforgettable.
Ingredients You’ll Need
- 2 packets (8 oz total) instant vegan vanilla pudding mix (or 1 batch homemade)
- 4 cups non-dairy milk of choice, divided (skip if using homemade pudding)
- 2 packages (10 oz total) allergen-free vanilla wafers, divided
- 3 bananas, plus 1 extra for topping
- ½ tablespoon lemon juice
- 2–3 cups dairy-free whipped topping (like coconut whip)
How to Make Allergen-Free Banana Wafer Pudding
1. Prepare the pudding
In a large bowl, whisk together the instant vegan pudding mix with 4 cups of non-dairy milk. Let it sit for a few minutes until thickened. If using homemade pudding, prepare it ahead of time and allow it to cool.
2. Slice and prep bananas
Slice your bananas into even rounds and gently toss them with the lemon juice. This helps prevent browning and keeps your pudding looking fresh.
3. Start layering
In a large serving dish (or individual cups), begin with a layer of vanilla wafers.
4. Add bananas and pudding
Top the wafers with a layer of banana slices, followed by a generous layer of pudding.
5. Repeat layers
Continue layering wafers, bananas, and pudding until everything is used, finishing with pudding on top.
6. Add whipped topping
Spread 2–3 cups of dairy-free whipped topping over the top layer.
7. Garnish
Crush a few extra wafers and slice the remaining banana to decorate the top.
8. Chill
Refrigerate for at least 4 hours, preferably overnight, to allow the flavors to meld and the wafers to soften.
Top 9 Tips for the Best Allergen-Free Banana Pudding
1. Use a Creamy Non-Dairy Milk
Oat milk (like Oatly) works beautifully because it mimics the richness of dairy milk. Coconut milk is another great option if you want extra thickness.
2. Don’t Skip the Lemon Juice
It may seem small, but tossing bananas in lemon juice keeps them from browning and adds a subtle brightness that balances the sweetness.
3. Choose the Right Wafers
Allergen-friendly wafers can vary in texture. Look for ones that soften nicely without completely dissolving.
4. Let the Pudding Fully Set
Instant pudding thickens quickly, but giving it a few extra minutes before layering ensures better structure.
5. Layer Evenly
Try to distribute ingredients evenly so every scoop has cookies, bananas, and pudding.
6. Chill Long Enough
This is key. The magic happens in the fridge as the wafers soften into that classic cake-like texture.
7. Use Fresh (Not Overripe) Bananas
Slightly ripe bananas hold their shape better and prevent the pudding from becoming overly mushy.
8. Customize for Additional Allergies
If avoiding corn or legumes, opt for a homemade pudding and whipped topping that fits your dietary needs.
9. Make It Ahead-Friendly
This dessert actually tastes better the next day, making it perfect for prepping in advance for parties or busy weeks.
Optional Variations
- Homemade Pudding Version: Swap the instant mix for a cornstarch- or arrowroot-based homemade vanilla pudding.
- Extra Creamy: Fold some whipped topping directly into the pudding before layering.
- Mini Servings: Assemble in jars or cups for easy, mess-free serving.
- Flavor Twist: Add a sprinkle of cinnamon or drizzle dairy-free caramel between layers.
Why This Recipe Works
This banana wafer pudding isn’t just “free-from”—it’s full of flavor, texture, and comfort. The creamy pudding, soft wafers, and fresh bananas come together just like the classic version, while remaining safe for those with gluten, dairy, and nut allergies.
It’s a dessert everyone at the table can enjoy without a second thought—and that’s what makes it truly special.
Final Thoughts
Allergen-friendly baking doesn’t have to be complicated or intimidating. With the right ingredients and a few smart techniques, you can recreate timeless desserts in a way that’s inclusive and just as delicious.
This top 9 allergen-free banana wafer pudding is proof that simple swaps can still deliver big results. Make it once, and it’s bound to become a staple in your recipe rotation.
Print
Vegan Gluten Free Banana Wafer Pudding
This is such an easy and yummy recipe and it’s Top 9 allergen free plus can be made corn and legume free! Takes 10-15 mins to make. Serves about 8 large servings.
Ingredients
- 2 packets (8oz total) instant Vegan vanilla pudding mix, OR 1 batch homemade
- 4 cups non dairy milk of choice, divided (I like oatly oat milk) *Skip this ingredient if making homemade pudding
- 2 packages (10oz total) top 14 free vanilla wafers, divided
- 3 bananas, 1 extra for topping
- 1/2 TB lemon juice
- 2–3 cups So Delicious Coco Whip, OR homemade (if corn and legume free)
Instructions
- Blend one packet of pudding with 2 cups non dairy milk in a blender on high, till smooth and thick, about 2-3 mins, (or make 1 batch homemade pudding).
- In a 9 inch square or circle dish, Layer 1/3 of the wafers, then 1/2 of the sliced bananas, and the first packet of pudding mixture, (or 1/2 the batch of homemade pudding).
- Repeat step one, if using store-bought instant pudding.
- Layer 1/3 more wafers, then 1/2 of the sliced bananas, and second batch of pudding (or final 1/2 batch of homemade pudding).
- Refrigerate 10-15 mins and serve cold. The longer it’s refrigerated, the softer your nilla wafers will become. (Refrigerate for 3-5 hrs if making homemade pudding batch).
- When ready to serve, top with vegan whipped cream & the rest of the nilla wafers both crushed and whole. You can also top with extra banana slices, if desired. Serve cold and enjoy!